
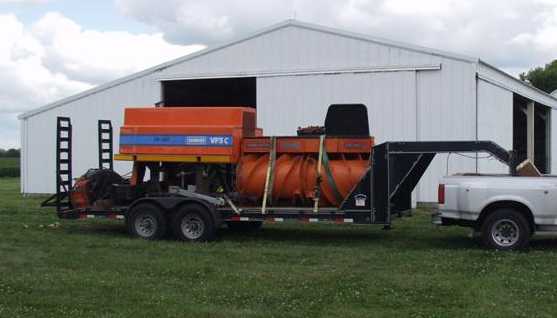
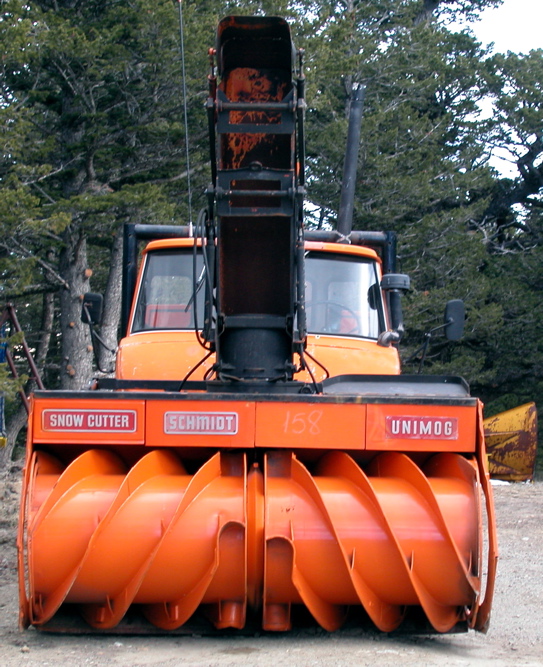
This describes my snowcutter, how I got it, and what I did to repair it and install it on my Mog. (There is more information in the Mog Blog - the 07-Aug-2004 and subsequent entries - but most of it is reproduced here.)
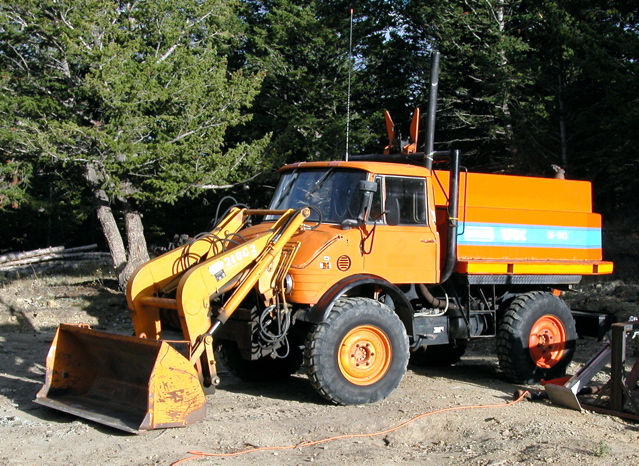
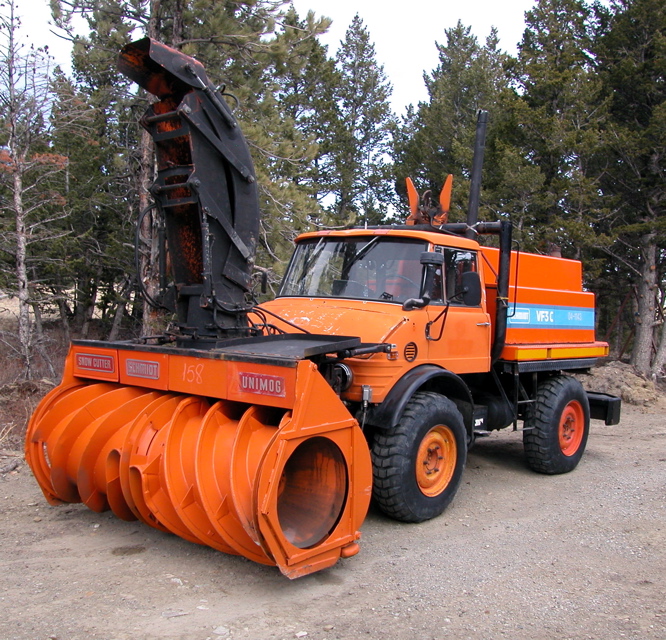
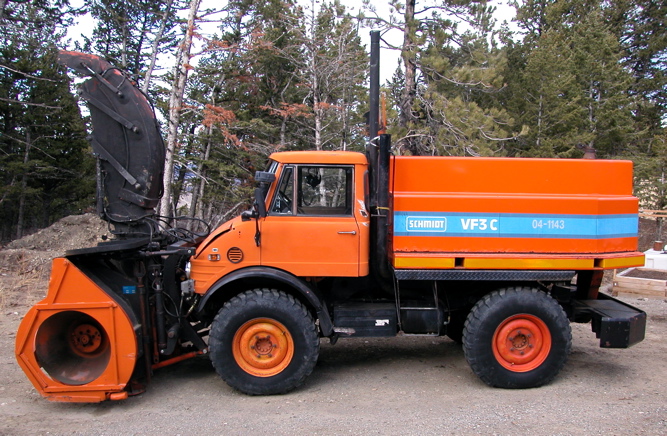
After being unable to plow some of the big drifts in the Winter of 2003, I started seriously thinking about getting a snowcutter. Thanks to lots of good advice from Jack Russell, I knew I wanted a VF3. I noticed that the State of Michigan was auctioning a Case MB4/94 with a VF3C, but I didn't need the truck and Michigan is a long way away. A little while later, the snowcutter showed up on the Unimog Exchange - the guy who bought it lived in San Antonio TX and didn't have a lot of use for it :) Below is picture of the original truck.
I made an offer, but then found out that the intermediate transmission on the cutterhead was broken. This is an enclosed geartrain on the back of the cutterhead that consists of four gears that connect to the driveshaft (underneath the Mog) on one end and to the final transmission driveshaft (inside the cutter drums) on the other end. I was very leery of buying it sight-unseen but the seller was very forthcoming and reasonable. After a few negotiations and various discussions, I bought it at the beginning of August 2004.
The stuff was loaded onto a gooseneck trailer and the hauler made good time getting here (well, almost here). Unfortunately, he got stuck about 2 miles from my place - his pickup would spin its wheels on the gravel road. I went down and pulled him out with the Mog but we decided his rig wasn't going to make it up to my place. We unloaded the power unit using the stands but my loader couldn't pick up the cutter head - I couldn't lift it high enough to clear his trailer, and trying to lift from the bottom, the moment arm was too great. I got hold of a guy with a big (6 yd) loader who came and unloaded the gooseneck. I put the power unit on my trailer and hauled it up to my place with my Jeep. The big loader hauled the cutter head up to my place. Below is a picture of the loaded gooseneck.
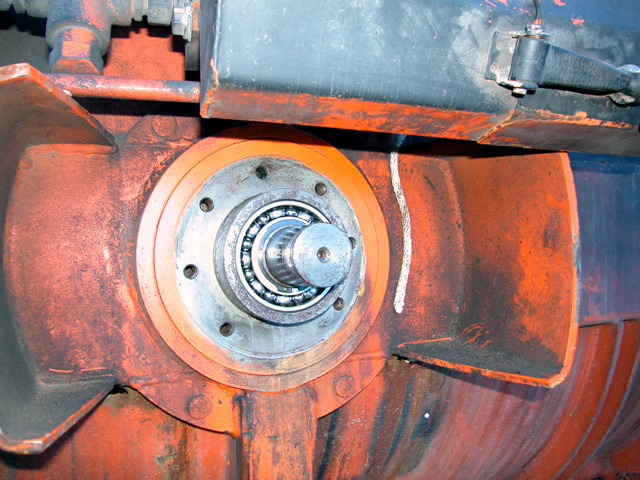
The intermediate gearbox was in a separate box and looked like it had been that way for quite a while. Luckily, most of the parts were there. The main bearing on the output shaft was damaged and still pressed into its housing on the cutterhead. I spent a lot of time removing the shaft key, the snap ring, the failed bearing and the mangled shaft seal behind it. I got to buy a bunch of new tools and use some of them in creative ways, but I finally got it all out. I ordered replacement parts from Schmidt and waited...
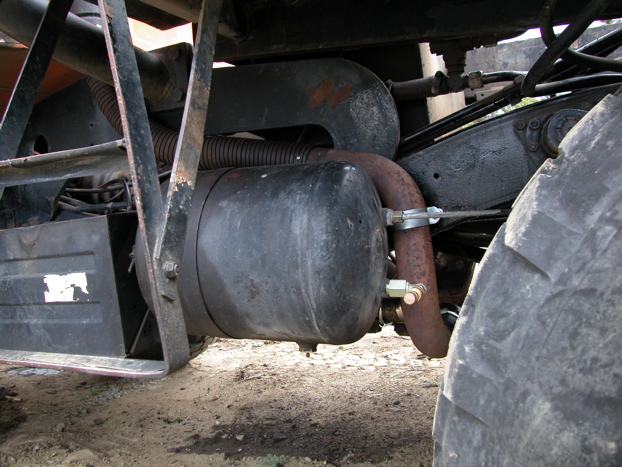
While I was waiting for the parts for the intermediate transmission, I still had a bunch of things to do. I removed the airtank from the Mog and added an adapter so that I could plug the power unit air hose into it. I used a standard 1/4" quick-connect socket so that I can have access to air for other things too - e.g. inflating tires. I mounted the bracket for the intermediate driveshaft bearing on the Mog. This was a bunch of work, because it interfered with the exhaust pipe - I ended up modifying my (already modified) exhaust pipe. I also moved the vertical tailpipe so that it wouldn't interfere with the power unit.
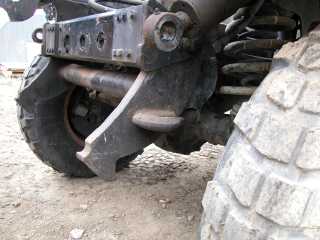
I fabricated a stand for my Case 26 Extend-a-hoe and removed it. I found that one of the "parking" brackets for the rear hydraulic tilt cylinders was missing, so I fabricated one. I also replaced a missing snap ring on the pin that holds the tilt cylinder to the frame. I removed the hand throttle bracket (used for the backhoe) and wired the cable so it won't move. I also had to remove the valve and extra hydraulic lines that had been installed to run the Sweepster.
Then I tried backing up under the VF3C power unit. Unfortunately, it wouldn't fit because San Bernardino County had welded a couple of hooks to the lower frame (why they did this I can't imagine). Removing these hooks was difficult because my portable band saw didn't fit well into the space available - I managed to cut off most of the hooks, but had to spend about an hour with the grinder removing the rest.
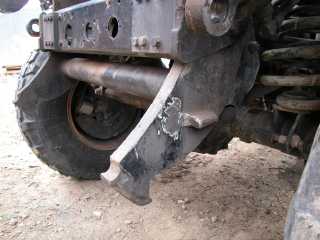
Once the power unit was on the bed, I had to drill two mounting holes for the M30 mounting bolts. I used a 1/4" drill from the top to locate the holes and then a 1-3/8" hole saw from the bottom (there wasn't room to drill the large hole from the top). This entailed temporarily removing the air regulator and bracket from the right side.
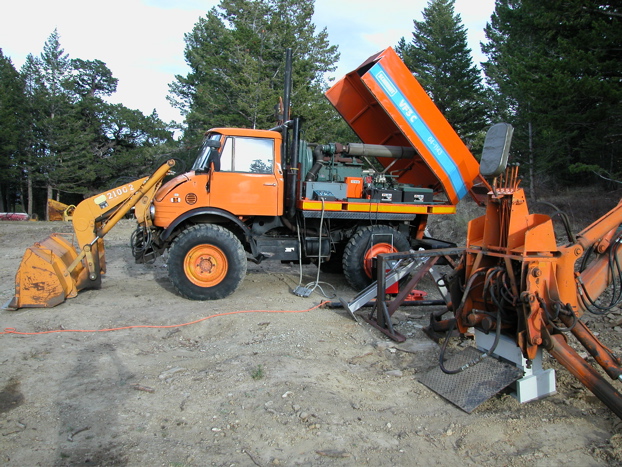
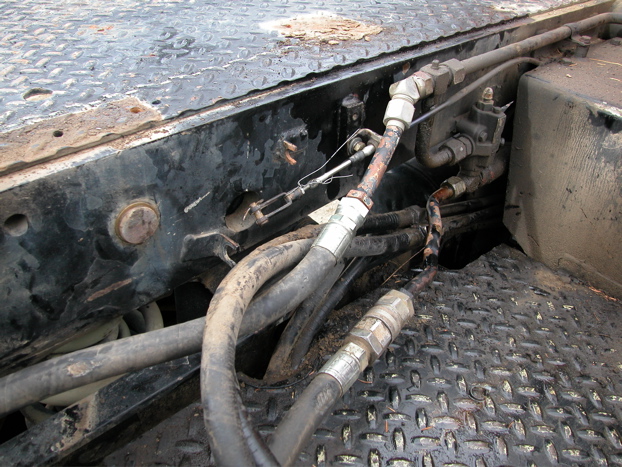
I tried to connect the driveshaft from the power unit to the intermediate bearing. The linear slide part of this shaft was frozen, so I spent quite a while grovelling under the Mog to free it up. I hooked up the control box and tried to start it. The batteries were dead, so I charged them and it started right up. The engine seems to run very well. All the controls seem to work, except for the high/low gear selection which sticks. Could be the air cylinder, could be the transmission itself. I can probably live without it, but it's on the To Do list.
I had removed the mounting frame from the cutterhead in order to get access to the intermediate transmission. In doing so, I discovered that the fasteners and ball joint bearings were badly corroded. I spent a lot of time removing the pins from the lower arms - I had to cut them with my portable band saw and I had to drill one of them out.
After six weeks, I finally received the parts from Schmidt. I carefully cleaned and de-rusted the snowcutter main drive shaft and the housing that's welded to the snowcutter body. Then I installed the replacement seal, the big ball bearing, and the retaining ring. I oiled everything and wrapped it in plastic, so that it wouldn't rust while I was rebuilding the intermediate transmission.
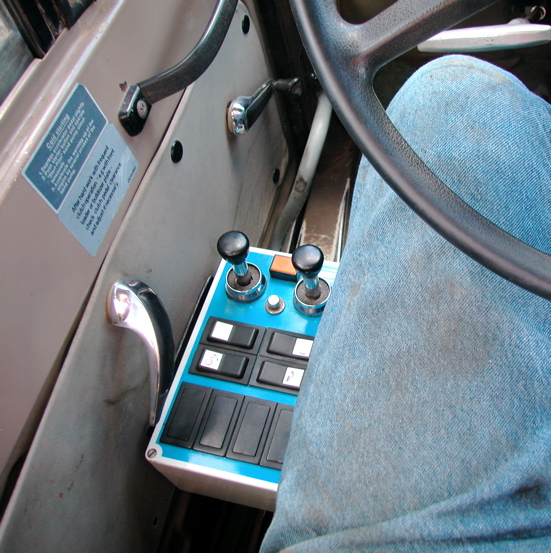
I installed the power unit control connector on the cab. This is a pair of connectors that mount back to back on each side of the rear cab wall. A fat (20mm diameter) 25-wire cable runs between them. I punched a hole in the cab floor, installed a grommet, unwired the cable from one connector, mounted the connectors, ran the cable down through the grommet and back up to the inside connector, and rewired the cable to the inside connector. I plugged in the control box and did a quick test - it seemed to work OK. The control box mount didn't come with the unit, so I used a couple of draw latches as a removable mount on the doghouse.

I installed the cutterhead control box to the driver's door.
I bought a large polyethylene storage box and filled it with cleaning fluid (I had originally planned to get a real parts washer, but they were backordered). I washed and scrubbed the parts - it was difficult to get the mixture of dirt and gear oil out of the all the nooks and crannies - I ended using a lot of paper towels wrapped around a screwdriver to get it all clean - tedious but effective. I also managed to drop the heavy geartrain from a couple of inches while taking it out of the box - the bottom of the box broke and I had to run around transferring the fluid into buckets before it covered the whole floor.
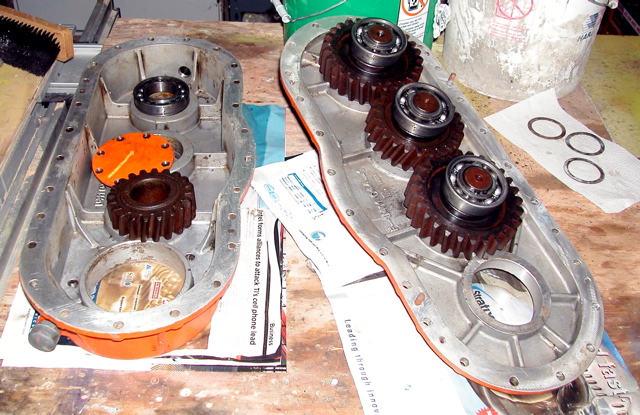
I installed the shaft key - I had to machine it down to the right size because the one that came from Schmidt was too long. Next came the gear followed by the second bearing.
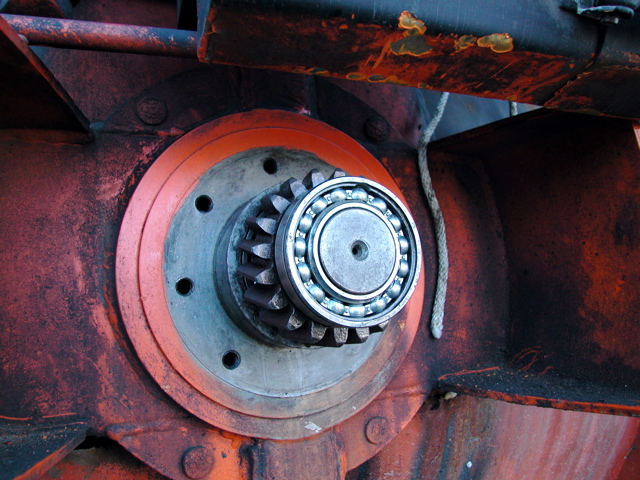
I installed the back of the housing using RTV gasket goo. I discovered a broken-off screw in one of the mounting holes, but luckily it came out pretty easily. Here is a picture of the back of the housing installed and the front of it ready to go.
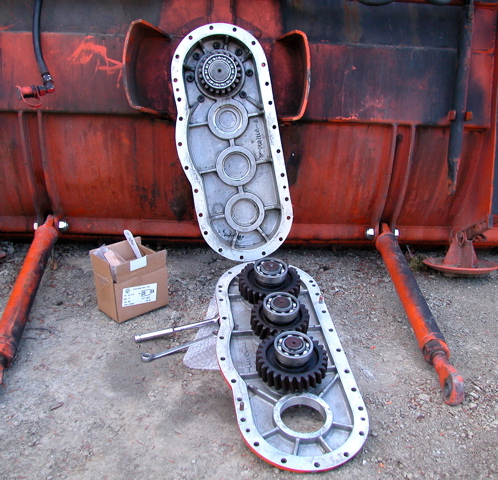
Installing the front of the housing was a bit of a struggle - I used several clamps and a few taps from the copper-head hammer to get things started and then the bolts pulled it together.

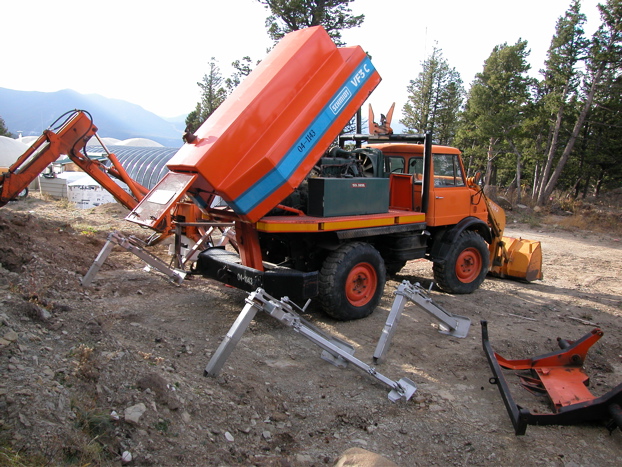
I used the loader to install the lifting frame and chute. Then I attached the driveshaft to the intermediate gearbox. I removed the loader and installed the connector and wiring for the cutterhead control box.
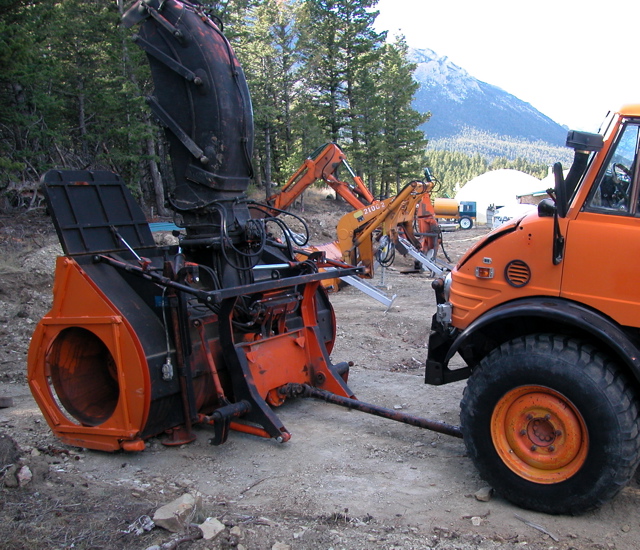
The replacement ball joint bearings for the lifting cylinders took a couple of weeks to show up and I was away for a while. Once I got back, I installed them and mounted the cutterhead. It seems to work fine - now I just need a big dump of snow so that I can get some action shots!
| Mog Page | Project Page |